
How to Print Screen on Dell Laptops and Computers: The print screen function of a PC is essential. Here, I will show you how to print screen/screenshot on a Dell laptop.
What is the meaning of Print Screen?
The action of pressing the “Print-Screen” button (PrtSc) on your keyboard and using it to capture something on the screen that you want to save as an image is referred to as print screen. After that, the image can be pasted into Paint and saved. After saving it, you can send it, print it, view it, or simply reflect on it.
Simply put, a print screen is an image that shows the contents of a computer display.
Print screen captures an image of your entire screen or application window and saves it to your system clipboard. You can save it to your computer or paste it into another application from your clipboard.
Importance of Print Screen and Screenshots
Screenshots are important as a picture is more engaging and meaningful than a lengthy paragraph.
Screenshots are helpful when reporting an issue. When you report a problem, IT or Web Support may frequently request a screenshot. Providing a screenshot makes it much easier for the support team to figure out what’s wrong and how to fix it.
Must Read: Facebook Dating App – Facebook Online Hook up for Singles
A screenshot is a fantastic tool for both personal and professional purposes. If you have a Dell laptop or computer and are unsure how to capture your screen on a Dell device, keep reading.
Print Screen Key
The Print Screen key, often abbreviated Prt Scr, is a valuable key supported by most PCs. When you press the Print Screen key in DOS, the computer sends whatever images and text are currently displayed on the screen to memory, specified software, or a printer. The Print Screen key is used by some graphics programs, including Windows, to capture screenshots.
The print screen is a key found on the majority of PC keyboards. It’s usually found in the same section as the break and scroll lock keys. The print screen and the system request may share the same key.
Note: Print Screen is usually found in the upper right-hand corner of the keyboard. The Print Screen key is labeled differently on different keyboard models, such as PrintScreen, PrntScrn, PrntScr, PrtScn, PrtScr, PrtSc or a similar abbreviation.
Now, let me show you two ways to take a screenshot or print screen on Dell laptops and computers.
How to Print Screen on Dell Laptops and Computers
How to use the print screen key in Microsoft Windows operating systems

Read on as I provide information on making a Print Screen request and using the Print Screen key to capture a snapshot of images, pages, or windows on your computer screen quickly and helpfully.
How to Use the Print Screen Key in Dell PC
A screenshot or screen capture is a snapshot of your computer screen. When you take a screenshot, it is automatically copied to your computer’s clipboard.
You can then paste the screenshot into a document, email message, file or image editor (such as Paint) or save it as a file and insert it as a picture into a document, email message, file or image editor.
Other keyboards may lack a dedicated Print Screen key. In this case, you can print the screen by pressing and holding down the Fn + Insert keys simultaneously.
First, you may need to identify your PC’s Windows operating system, as the Print Screen function operates slightly differently in each Windows operating system.
How to use the Print Screen Key in Windows 11, Windows 10, Windows 8.1 and Windows 8
Taking a Screenshot of the Entire Screen
- Press the Windows logo key + the PrntScrn key together.
- Your screen will flicker for a second, indicating that you successfully took a screenshot.
How to Take Screenshots of All Active Windows
- Simply Press the PrntScrn button.
Additional Reading: Top 35 Bookfi Alternatives – Best Alternatives to Bookfi.net
Taking a Screenshot of a Single-Active Window
- Tap or click on the window you want to capture.
- Press the Alt + PrntScrn keys together.
How to use the Print Screen Key in Windows 7
- Press the PrntScrn key to capture the entire screen.
- To capture an active window, press the Alt + PrntScrn keys at the same time.
- Your screen will flicker for a second, indicating that you successfully took a screenshot.
How to use the Print Screen Key in Windows XP and Windows Vista
- Same as Windows 7
After using the Print Screen key to capture the desired screen or window, you must paste the captured image into an image editor such as Microsoft Paint or Photoshop to edit or save it.
To paste the image into a new image document, open the appropriate application and press the Ctrl-V key combination.
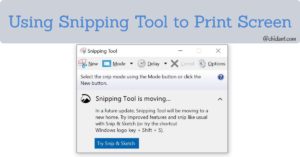
Another sure way to print screens and do more complex screen captures is by using the snipping tool.
For More Information, Visit the Dell Support Page Here.
How to Use Snipping Tool to Print Screen
Types of snips
1. Free-form snip
- Draw a free-form shape around an object.
- It facilitates capturing your screen in any shape you want.
2. Rectangular snip
- The rectangular snip is the default option.
- Drag the cursor around an object to form a rectangle.
3. Window snip
- Select a window, such as a dialog box that you want to capture.
- The Window Snip lets you capture your active windows with one simple click.
4. Full-screen snip
- Capture the entire screen.
- This feature will be convenient if you’re using multiple monitors.
How to Open Snipping Tool
Here is how to use the snipping tool to Print Screen on Dell laptops and computers:
Opening Snipping Tool For Windows 10
- Select the Start, enter snipping tool in the search bar, then select Snipping Tool from the results. Or,
- Press Windows logo key + Shift + P.
Opening Snipping Tool For Windows 8.1 or Windows RT 8.1
Procedure involves:
- Swipe in from the right edge of the screen
- Select Search, enter snipping tool in the search box
- Then select Snipping Tool from the list of results.
Opening Snipping Tool For Windows 7
Opening Snipping Tool on Windows 7 involves:
- Select Start
- Enter snipping tool in the search box
- Select Snipping Tool from the list of results.
After you’ve taken your print screen photo, press ‘Ctrl + S’ to save it in the location of your choice.
I hope this guide on how to print screen on Dell laptops and computers helps.
Let us know in the comment section.
Recommended:
How to Turn Off Mouse Acceleration on Mac (2023 Guide)
Where to Download Paid eBooks for Free